Win a Fix-A-Stitch hook set. This looks like a great product. I sometimes used a tiny hook (almost too small to see) at a bridal shop to fix tiny fabric flaws by pulling snags to the back of the work. This seet has a variety of tools for various problems.
Good luck, readers, although I'm hoping I win!
Tuesday, September 30, 2014
Sunday, September 28, 2014
Testing New Yarn Again
Gifts for Joggers and Dog Walkers

As soon as autumn begins, it is time to take stock of warm winter accessories and quickly knit anything that is lacking. Although we have lots of hats in our coat closet, I noticed some new yarn at Wal-Mart (Red Heart Reflective) and JoAnn (Heads Up.) It would have been hard not to notice, as these yarns are designed for visibility, either through light colors or through the addition of a reflective metallic thread to the yarn. So, I decided we needed new hats for evening outdoor safety. As a bonus, the Heads Up yarn is so soft it is incredibly soothing to knit with it.
My detailed reviews of both yarns are now on Hubpages. I was able to get a complete adult hat in 2 by 2 ribbing on size 9 needles and still have some yarn left for a pom pom or possibly some wristbands for more visibility.
Tuesday, September 23, 2014
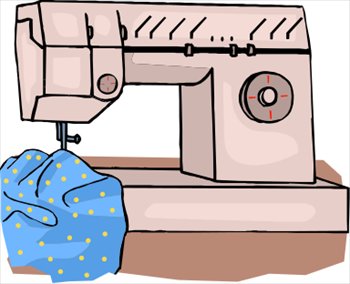
Ruffles: How to Sew Them
Making ruffles with your sewing machine is a skill that is useful for constructing
curtains, little girls' dresses, throw pillows, and more. While the traditional
method shown in sewing books is to sew two parallel rows of basting, then pull
the ends to gather the ruffle (hoping the threads don't break and necessitate
starting over) there is a better way. It is not difficult, involving only a
straight stitch and a zig-zag stitch.
First, cut the ruffle fabric according to your
pattern. If you are not using a pattern, measure the length of the area to
which the ruffle will be sewn; hemline, pillow perimeter, or curtain width. The
length of the ruffle piece should be two to four times the desired finished
length of the ruffle. The width of the ruffle is the desired finished width
plus a seam allowance at the top and a hem at the bottom. Piece several
rectangles together if you need a long piece.
Hem the narrow ends of the ruffle, unless the
ends will be sewn to each other (as with a pillow or a skirt hem.) Hem one long
edge as well. Leave the other long edge raw as that will be the gathering edge.
Lay a long piece of crochet cotton ( the
gathering string) parallel to and about 3/8 inch from the raw edge. Feed the
fabric and the string under the sewing machine's presser foot so that the
string is directly in the path of the needle if a straight stitch is sewn. Set
the machine for a medium zig-zag stitch, checking to be sure the needle will
swing in such a way that the gathering string is not caught in the stitches,
but is encased by the zig-zags. Be sure the stitches will all be inside the
seam allowance. Stitch the length of the ruffle.
Secure one end of the crochet cotton to the
ruffle with a pin to make sure it will not be pulled out of its zig-zag casing.
Grasp the other end of the string and pull until the ruffle is gathered to the
correct length. Secure the loose end of crochet cotton with another pin. Baste
(with pins or stitches) the ruffle to the edge you are ruffling (the "base
fabric"), right sides together, making sure the gathers are distributed
evenly along the entire length of the ruffle. Sew the ruffle and the base
fabric together using a regular straight stitch. Remove the gathering string by
unpinning the ends and pulling on one end.
This method is much more satisfactory than the
parallel basting stitches method for most applications. If, however, you have
many long ruffles to make, e.g. making ruffled curtains for your entire house,
a ruffler attachment is available for most sewing machines. Making ruffles with
your sewing machine is a simple way to add a special touch to your sewing
projects, and this method will give good results on most fabrics.
Saturday, September 20, 2014
Looking for Special Knitting Projects? Here You Go!
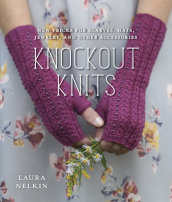
This delightful knitting book by a young designer is one of the most organized pattern books I have ever seen. There are three groups of projects, each highlighting a special knitting technique: wrapped stitches, knitted lace, and beaded knitting. Within each group, projects proceed in order of increasing complexity/difficulty.
Although the lovely photographs make me want to make everything, I have chosen one project from each chapter to begin with. From the wrapped stitches group, I plan to make the Prolix Mitts. From the lace chapter, I've chosen the Juego Cowl. From the beaded group, I hope to knit the Laden Fauxbius wrap--an ambitious combination of beads, lace and cables!
Because of the organization, great illustrated instructions, and variety of projects, I can recommend this book to knitters of all skill levels.
I received a free review copy of Knockout Knits by Laura Nelkin from the publisher, Random House.
I received this book from Blogging for Books for this review
Friday, September 19, 2014
Blocking Basics for Knitters
After the pieces of a sweater
or other garment are knitted, the next step is blocking the knitted pieces.
Knitted pieces should be blocked before they are sewn together. Blocking is a
process which sets the shape of knitted pieces, giving smooth edges which make
neater seams. Items knit in one piece, such as socks, mittens or shawls, are
also blocked. These instructions are for simple, damp blocking of knits without
the use of steam.
Blocking supplies and equipment
You will need a flat, padded surface in order to
block most knitting. Also have on hand rust-proof pins, such as T-pins or quilting pins with
large round heads that will not get lost in the texture of the knitting. A
corrugated cutting board with a one-inch grid, found at most fabric stores,
makes a good blocking surface. Cover the board with clear plastic to protect
the cardboard from moisture. Smaller items such as doilies or collars may be
blocked on a well-padded ironing board. If money is no object, special blocking
boards are available from specialty knitting shops.
Blocking by the piece
Dampen items to be blocked, using lukewarm
water. Lay pieces flat on a padded surface. Pat or stretch each piece to
correct measurements, pinning at intervals of ½" to 1" to get a
smooth edge. Sleeves or other identical pieces may be stacked and blocked
together. Allow pieces to dry completely before removing pins. For long,
straight edges, it is faster to use blocking wires, which are inserted along
the edges of sleeves, sweaters, or shawls to hold the edge straight while it
dries. Once pieces are blocked to correct measurements, sew seams to finish
your garment.
Blocking completed items
If you knit many socks, buy or make some sock blockers, which
are water-resistant, rigid shapes to place inside socks as they dry. You may
use stiff plastic, like that used for quilting templates, to make sock or
mitten shapes for blocking items. Larger items may require an entire tabletop
or floor for blocking. If items do not need stretching, simply lay flat on
floor between two terry towels. The texture of the towels will be enough to
hold the shape of the pieces.
Source:
Learn How Book. (1959). New York: Coats &
Clark, Inc.
Monday, September 15, 2014
Save Money on Sewing Supplies

Sewing your own clothing and
home décor can save money if done wisely. Done without planning, however, sewing becomes just an expensive hobby. Follow these
five tips for saving money on sewing supplies.
Buttons
Buttons can be expensive if purchased by the
card. Look for unusual buttons on thrift store or garage sale clothing. Recycle
the buttons from worn clothing. If you need many buttons of one type, e.g.
pearl buttons for bridal gowns, order in bulk bags from a dressmaker supplier.
Bias Binding
Men's dress shirts can be recycled into bias
binding. The collars and cuffs wear out long before the rest of the shirt, so
make use of the good fabric in the back of the shirt. Cut back of shirt off
near side seams, sleeve seams and collar seam. Press flat. Lay fabric on
cutting board and mark straight grain along one edge. Mark another line at a 45
degree angle to the grain line (true bias.) Draw lines parallel to the 45
degree line at two-inch intervals. Cut along the marked lines. Each shirt back
yields enough bias binding for the armholes and neckline of a dress. This
binding is more lightweight and flexible than standard packaged binding, often
giving better results. Bias binding can also be cut from leftover dress fabric.
Using matching bias to trim a dress gives a professional touch without added
expense.
Zippers
Zippers from gently worn clothing may be removed
and recycled in a new project. Do not recycle worn zippers, however, since it
is an effort to replace zippers-better to pay for a brand new one.Home Sew and Newark Dressmaker Supply offer grab bags of zippers in assorted sizes and colors so you can
have some on hand if you do a lot of sewing. Rolls of zipper tape are also a
good option, enabling the user to make zippers exactly the right length for
each project.
Lace and Netting
Lace and netting are surprisingly durable,
despite their delicate appearance. Using a single-edged razor blade or a
surgical-style seam ripper, carefully remove lace trim from older formals and
save for a future project. The netting in petticoats can be saved as well to be
used for costumes or to make ruffled petticoats for little girl's dresses.
Coupons
Get on the mailing lists for your local fabric
and craft stores. Many mailings include a 50% off coupon for a single item.
Decide on the item you most need that month and use your coupon. Also watch for
pattern specials. Once or twice a year certain brands of patterns may sell for
a dollar each, so keep a list of patterns you like and wait to buy until the
sale comes along.
Do more sewing and less spending using just
these simple tips. Keep the fun, but lose the retail prices!
Friday, September 12, 2014
Sewing Supplies from the Workshop

T-squares are perfect for marking straight
pattern pieces; no need to pin the tissue to the fabric, just measure the
pattern piece and draw the lines on the fabric using the T-square and a
dressmaker's pencil. The T-square is also handy for marking cutting lines for
rectangular tablecloths or curtains-no pattern needed.
Needle-nosed pliers are used by dressmakers for
pulling needles through thick fabrics. In bridal sewing, pliers may be used to
crush beads within seam allowances when taking in a beaded dress. Crushing
beads leaves the threads intact, so the beads on the outside of the dress will
not come loose. Be sure to borrow some eye protection from the workshop as well
before crushing beads.
Drafting tape or masking tape can be used to
hold layers of fabric on a cutting surface and keep them from shifting while
patterns are pinned and cut.
Monday, September 8, 2014
Here Goes Fiverr!

I am offering a few knitting-related services and items on Fiverr. Here are two:
I will test and proofread your original knitting pattern.
I will convert a knitting pattern to a different size.
Help! I Don't Have Enough Fabric!
You have the perfect pattern and the exact
fabric you want to use, but something is wrong. You don't have enough fabric.
Perhaps you misread the chart on the pattern envelope. Perhaps you want to use
fabric from your stash and cannot possibly find more yardage now. Whatever the
reason for your shortage, there is hope! Here are five possible solutions if
you don't have enough fabric.
Contrasting fabric
Let's assume nobody is going to see the wrong
side of your garment but you. That means you can use any fabric of similar
weight and fiber content for facings, linings, and inseam pockets. Have some
fun and use a whimsical print or shocking color on the non-public side of the
garment. Imagine wearing your sedate business suit with a smile; while sitting
through a boring meeting, you laugh inside knowing that your pocket linings
have little pink kittens on them.
Facing substitutes
Facings are often oddly shaped and cause you to
waste large scraps of fabric. Consider whether you can make a facing narrower
without compromising the structure of the garment. By substituting bias
bindings at necklines or armholes, you may save enough fabric to save your
project.
Adjust garment fullness
If you are experienced enough to redraft a
pattern, you can sometimes remove some of the fullness from a garment. Can you
remove a pair of pleats or adjust the amount of flare in a skirt? Can you
substitute a more tailored sleeve for a gathered sleeve? Be sure you do not
make a skirt so narrow you cannot walk freely.
Rotate the pattern layout
The pattern layout may work if you cut the
pieces on the crosswise rather than the lengthwise grain. Do not try this with
a napped fabric, one-directional print, or plaid. This is also not an option
for knits, since the stretch of the fabric would not be oriented correctly. If
you have a plain woven fabric, however, this adjustment may buy you the extra
yardage you need.
Piece work
Finally, you may piece scraps together to create
larger pieces of fabric. Even expensive wedding gowns use this method, since
one loom-width of fabric may not accommodate a long train. For example, you may
not be able to cut a skirt front on the fold; instead, sew two pieces of fabric
together and place the seam at the center front fold.
Be persistent and you may find you do indeed
have enough fabric. In fact, your initial shortage may have caused you to do
something creative that actually enhanced the finished garment. Admiring
friends might think you put bias-cut pockets on your plaid shirt on purpose.
Wednesday, September 3, 2014
Unusual Knitting: Wedding Gowns, Scientific Inspiration, and More
While I still enjoy crafting simple scarves after more than thirty years of knitting, I also love to experiment. If you are also a knitter who likes to ask "What if..." or explore the boundaries of what can be done with two pointy sticks and some string, these patterns are right up your alley.
Wedding Gown Patterns
Yes, you can find patterns for knitted wedding
gowns! Interweave
Knits offers a free
pattern for a full-length lace gown. Vogue Knitting offered a design by
Nicky Epstein in their fall
2012 issue. For a theme wedding, the Elfin Bride
pattern is gorgeous
with long, flared sleeves. A wedding dress is a major commitment, so make sure you
knit some sample swatches with yarns you think will work, using the various
pattern stitches in your chosen dress pattern. Be absolutely sure you are
getting the gauge right, too. Nobody wants to knit for months only to have a
dress that doesn't fit!
You Knit a What?!
Just for fun, there are some books I recommend
because the projects are so unexpected. Knit Your
Own Zoo by Sally Muir
and Joanna Osborne is one such book. Why not knit an aardvark or a giraffe?
These projects use pipe cleaners where stiffness is required, so don't make
them for toddlers or babies.
If you do knit for children, Knitted
Farm Animals by Sarah Keen
is a better choice. The hen and chicks would make a fun gift for a young child.
Another whimsical project is knitted
food. Sometimes knitting should just be fun.
Scientific Knitting
June Oshiro created a DNA scarf as a gift for one of her professors. The double helix is created
by a carefully charted series of cables. I love this design, but must admit
that I gave up after a few inches out of concern that I would lose my place at
some point and have to rip out cables (not fun!) I prefer color work to cables,
but knitters who love Aran sweaters and have the patience to follow cable
charts should give this pattern a go. I chose instead to use my unravelled yarn
for a much simpler scarf based
on the Fibonacci sequence.
For more ideas and inspiration for mathematical
knitting, check out this article
from American Scientist. The author, Sarah -Marie Belcastro, has knit
Klein bottles, Mobius bands, and other designs that illustrate mathematical
concepts. Elizabeth
Zimmerman, although not a mathematician, recognized the logical,
mathematical nature of knitting and even created the Pi Shawl--a design
copied by many knitters on many ways.
Keep knitting interesting by always looking for
something fresh to create. Inspiration is everywhere. Enjoy making something
extraordinary.
Subscribe to:
Posts (Atom)