Sunday, November 23, 2014

Fun Crocheted Hats for a Friend


I crafted these hats by adapting patterns I found through Ravelry.  The doll hats are sized for American Girl-type dolls.  This was quick, relaxing crochet.

For more crochet fun, check out some of my articles on HubPages:

Teaching Children to Crochet

Easy Crocheted Socks

Saturday, November 15, 2014

Knits Men Want: A Book Review


Bruce confirms what I have often suspected about men and knits. As a mother of 3 sons and wife to a professor, I can say "amen" to his facts about knitting for men.  Men know what they like and are cool with wearing the same basic style for a lifetime.

While my girls would wear many of my experiments, the boys would refuse anything even remotely cute or scratchy or tight or loose or hot...

The patterns in the book are just the things real men will wear. I look forward to using them all.  

Tuesday, November 11, 2014

Building with Blocks--for Knitters


I have never been disappointed by a Nicky Epstein book and Knitting Block by Block is no exception.  From basic blocks to framed blocks to colorwork, cables, and more, this book has more blocks than most knitters could ever use.  Chapters are organized by technique/style so knitters can go directly to their favorites. (I went straight to the Creative Colorwork chapter.)

Project instructions are included, so knitters can design their own garments and accessories by selecting some blocks and assembling them per Nicky’s instructions.  This is like a make-a-mix cookbook for knitters.

An especially convenient feature: color thumbnails of all the blocks at the back of the book.  Copy the pages, cut out the blocks, and try them out on the assembly diagrams in the instructions.  Nicky Epstein thinks of everything!


I received this book from Blogging for Books for this review.

Monday, November 10, 2014

Winter is a Great Reason to Knit

Why knit in the winter?  There are plenty of reasons besides the simple fact that it makes those cold, dreary days go by faster.


Knitting adds color
Gray skies and gray snow could get you down. Alternatively, you could get some colorful wool and knit striped socks in a riot of springtime colors. You could knit a bouquet of flowers on an intarsia sweater. You could even gather all your odds and ends to create patchwork afghan squares or use up small scraps in my Waste Not slip stitch scarf pattern.
Knitting adds warmth
Warm bodies and hearts by knitting some projects for charity. Whether you make lap robes for a convalescent center or hats for a homeless shelter, your efforts will show love to somebody who may need comfort. Spend those dark winter evenings indoors making a batch of warmth for those in need. Make sure your own family has a good supply of warm hats, mittens, and scarves, too.
Knitting also helps you keep your hands warm. Wooden needles stay warmer than aluminum needles, so use them for your winter knitting projects. Large projects such as sweaters and afghans will even keep your lap warm. Try to plan for making large projects in the winter rather than waiting till summer vacation's sweltering days.
Knitting adds life
While animals are hibernating and plants are dormant, your knitting is creating something that is growing and changing. Why wait until spring to bring new things "to life?" The calming, almost meditative rhythm of knitting is a perfect accompaniment while you daydream about planting your spring garden or filling your pool. Knitting may make the winter pass by so fast that you wish for an extra week or two for finishing a project!

Knitting Ideas: Divergent Scarves and Movie Fan Knitting

Monday, October 6, 2014

Finishing a Sweater

After the knitting comes the sewing up. Knitting is complete on my colorful version of the District 12 Sweater Side seams are done.  Now I need to block the sleeves to be exactly the same size before sewing then into the body.  Caron Simply Soft was my yarn of choice.


Tuesday, September 30, 2014

Giveaway to Share

Win a Fix-A-Stitch hook set.  This looks like a great product.  I sometimes used a tiny hook (almost too small to see) at a bridal shop to fix tiny fabric flaws by pulling snags to the back of the work.  This seet has a variety of tools for various problems.

Good luck, readers, although I'm hoping I win!

Sunday, September 28, 2014

Testing New Yarn Again

Gifts for Joggers and Dog Walkers

As soon as autumn begins, it is time to take stock of warm winter accessories and quickly knit anything that is lacking.  Although we have lots of hats in our coat closet, I noticed some new yarn at Wal-Mart (Red Heart Reflective) and JoAnn (Heads Up.)  It would have been hard not to notice, as these yarns are designed for visibility, either through light colors or through the addition of a reflective metallic thread to the yarn.  So, I decided we needed new hats for evening outdoor safety.  As a bonus, the Heads Up yarn is so soft it is incredibly soothing to knit with it.

My detailed reviews of both yarns are now on Hubpages. I was able to get a complete adult hat in 2 by 2 ribbing on size 9 needles and still have some yarn left for a pom pom or possibly some wristbands for more visibility.

Tuesday, September 23, 2014

Ruffles: How to Sew Them

Making ruffles with your sewing machine is a skill that is useful for constructing curtains, little girls' dresses, throw pillows, and more. While the traditional method shown in sewing books is to sew two parallel rows of basting, then pull the ends to gather the ruffle (hoping the threads don't break and necessitate starting over) there is a better way. It is not difficult, involving only a straight stitch and a zig-zag stitch.

First, cut the ruffle fabric according to your pattern. If you are not using a pattern, measure the length of the area to which the ruffle will be sewn; hemline, pillow perimeter, or curtain width. The length of the ruffle piece should be two to four times the desired finished length of the ruffle. The width of the ruffle is the desired finished width plus a seam allowance at the top and a hem at the bottom. Piece several rectangles together if you need a long piece.
Hem the narrow ends of the ruffle, unless the ends will be sewn to each other (as with a pillow or a skirt hem.) Hem one long edge as well. Leave the other long edge raw as that will be the gathering edge.
Lay a long piece of crochet cotton ( the gathering string) parallel to and about 3/8 inch from the raw edge. Feed the fabric and the string under the sewing machine's presser foot so that the string is directly in the path of the needle if a straight stitch is sewn. Set the machine for a medium zig-zag stitch, checking to be sure the needle will swing in such a way that the gathering string is not caught in the stitches, but is encased by the zig-zags. Be sure the stitches will all be inside the seam allowance. Stitch the length of the ruffle.
Secure one end of the crochet cotton to the ruffle with a pin to make sure it will not be pulled out of its zig-zag casing. Grasp the other end of the string and pull until the ruffle is gathered to the correct length. Secure the loose end of crochet cotton with another pin. Baste (with pins or stitches) the ruffle to the edge you are ruffling (the "base fabric"), right sides together, making sure the gathers are distributed evenly along the entire length of the ruffle. Sew the ruffle and the base fabric together using a regular straight stitch. Remove the gathering string by unpinning the ends and pulling on one end.

This method is much more satisfactory than the parallel basting stitches method for most applications. If, however, you have many long ruffles to make, e.g. making ruffled curtains for your entire house, a ruffler attachment is available for most sewing machines. Making ruffles with your sewing machine is a simple way to add a special touch to your sewing projects, and this method will give good results on most fabrics.

Saturday, September 20, 2014

Looking for Special Knitting Projects? Here You Go!


This delightful knitting book by a young designer is one of the most organized pattern books I have ever seen.  There are three groups of projects, each highlighting a special knitting technique: wrapped stitches, knitted lace, and beaded knitting.  Within each group, projects proceed in order of increasing complexity/difficulty.

Although the lovely photographs make me want to make everything, I have chosen one project from each chapter to begin with.  From the wrapped stitches group, I plan to make the Prolix Mitts.  From the lace chapter, I've chosen the Juego Cowl.  From the beaded group, I hope to knit the Laden Fauxbius wrap--an ambitious combination of beads, lace and cables!

Because of the organization, great illustrated instructions, and variety of projects, I can recommend this book to knitters of all skill levels.

I received a free review copy of Knockout Knits by Laura Nelkin from the publisher, Random House.

I received this book from Blogging for Books for this review

Friday, September 19, 2014

Blocking Basics for Knitters

After the pieces of a sweater or other garment are knitted, the next step is blocking the knitted pieces. Knitted pieces should be blocked before they are sewn together. Blocking is a process which sets the shape of knitted pieces, giving smooth edges which make neater seams. Items knit in one piece, such as socks, mittens or shawls, are also blocked. These instructions are for simple, damp blocking of knits without the use of steam.

Blocking supplies and equipment
You will need a flat, padded surface in order to block most knitting. Also have on hand rust-proof pins, such as T-pins or quilting pins with large round heads that will not get lost in the texture of the knitting. A corrugated cutting board with a one-inch grid, found at most fabric stores, makes a good blocking surface. Cover the board with clear plastic to protect the cardboard from moisture. Smaller items such as doilies or collars may be blocked on a well-padded ironing board. If money is no object, special blocking boards are available from specialty knitting shops.
Blocking by the piece
Dampen items to be blocked, using lukewarm water. Lay pieces flat on a padded surface. Pat or stretch each piece to correct measurements, pinning at intervals of ½" to 1" to get a smooth edge. Sleeves or other identical pieces may be stacked and blocked together. Allow pieces to dry completely before removing pins. For long, straight edges, it is faster to use blocking wires, which are inserted along the edges of sleeves, sweaters, or shawls to hold the edge straight while it dries. Once pieces are blocked to correct measurements, sew seams to finish your garment.
Blocking completed items
If you knit many socks, buy or make some sock blockers, which are water-resistant, rigid shapes to place inside socks as they dry. You may use stiff plastic, like that used for quilting templates, to make sock or mitten shapes for blocking items. Larger items may require an entire tabletop or floor for blocking. If items do not need stretching, simply lay flat on floor between two terry towels. The texture of the towels will be enough to hold the shape of the pieces.
Source:
Learn How Book. (1959). New York: Coats & Clark, Inc.


Monday, September 15, 2014

Save Money on Sewing Supplies


Sewing your own clothing and home décor can save money if done wisely. Done without planning, however, sewing becomes just an expensive hobby. Follow these five tips for saving money on sewing supplies.
Buttons
Buttons can be expensive if purchased by the card. Look for unusual buttons on thrift store or garage sale clothing. Recycle the buttons from worn clothing. If you need many buttons of one type, e.g. pearl buttons for bridal gowns, order in bulk bags from a dressmaker supplier.
Bias Binding
Men's dress shirts can be recycled into bias binding. The collars and cuffs wear out long before the rest of the shirt, so make use of the good fabric in the back of the shirt. Cut back of shirt off near side seams, sleeve seams and collar seam. Press flat. Lay fabric on cutting board and mark straight grain along one edge. Mark another line at a 45 degree angle to the grain line (true bias.) Draw lines parallel to the 45 degree line at two-inch intervals. Cut along the marked lines. Each shirt back yields enough bias binding for the armholes and neckline of a dress. This binding is more lightweight and flexible than standard packaged binding, often giving better results. Bias binding can also be cut from leftover dress fabric. Using matching bias to trim a dress gives a professional touch without added expense.
Zippers
Zippers from gently worn clothing may be removed and recycled in a new project. Do not recycle worn zippers, however, since it is an effort to replace zippers-better to pay for a brand new one.Home Sew and Newark Dressmaker Supply offer grab bags of zippers in assorted sizes and colors so you can have some on hand if you do a lot of sewing. Rolls of zipper tape are also a good option, enabling the user to make zippers exactly the right length for each project.
Lace and Netting
Lace and netting are surprisingly durable, despite their delicate appearance. Using a single-edged razor blade or a surgical-style seam ripper, carefully remove lace trim from older formals and save for a future project. The netting in petticoats can be saved as well to be used for costumes or to make ruffled petticoats for little girl's dresses.
Coupons
Get on the mailing lists for your local fabric and craft stores. Many mailings include a 50% off coupon for a single item. Decide on the item you most need that month and use your coupon. Also watch for pattern specials. Once or twice a year certain brands of patterns may sell for a dollar each, so keep a list of patterns you like and wait to buy until the sale comes along.

Do more sewing and less spending using just these simple tips. Keep the fun, but lose the retail prices!

Friday, September 12, 2014

Sewing Supplies from the Workshop


T-squares are perfect for marking straight pattern pieces; no need to pin the tissue to the fabric, just measure the pattern piece and draw the lines on the fabric using the T-square and a dressmaker's pencil. The T-square is also handy for marking cutting lines for rectangular tablecloths or curtains-no pattern needed.
Needle-nosed pliers are used by dressmakers for pulling needles through thick fabrics. In bridal sewing, pliers may be used to crush beads within seam allowances when taking in a beaded dress. Crushing beads leaves the threads intact, so the beads on the outside of the dress will not come loose. Be sure to borrow some eye protection from the workshop as well before crushing beads.

Drafting tape or masking tape can be used to hold layers of fabric on a cutting surface and keep them from shifting while patterns are pinned and cut.

Monday, September 8, 2014

Here Goes Fiverr!


I am offering a few knitting-related services and items on Fiverr.  Here are two:

I will test and proofread your original knitting pattern.

I will convert a knitting pattern to a different size.

Help! I Don't Have Enough Fabric!


You have the perfect pattern and the exact fabric you want to use, but something is wrong. You don't have enough fabric. Perhaps you misread the chart on the pattern envelope. Perhaps you want to use fabric from your stash and cannot possibly find more yardage now. Whatever the reason for your shortage, there is hope! Here are five possible solutions if you don't have enough fabric.
Contrasting fabric
Let's assume nobody is going to see the wrong side of your garment but you. That means you can use any fabric of similar weight and fiber content for facings, linings, and inseam pockets. Have some fun and use a whimsical print or shocking color on the non-public side of the garment. Imagine wearing your sedate business suit with a smile; while sitting through a boring meeting, you laugh inside knowing that your pocket linings have little pink kittens on them.
Facing substitutes
Facings are often oddly shaped and cause you to waste large scraps of fabric. Consider whether you can make a facing narrower without compromising the structure of the garment. By substituting bias bindings at necklines or armholes, you may save enough fabric to save your project.
Adjust garment fullness
If you are experienced enough to redraft a pattern, you can sometimes remove some of the fullness from a garment. Can you remove a pair of pleats or adjust the amount of flare in a skirt? Can you substitute a more tailored sleeve for a gathered sleeve? Be sure you do not make a skirt so narrow you cannot walk freely.
Rotate the pattern layout
The pattern layout may work if you cut the pieces on the crosswise rather than the lengthwise grain. Do not try this with a napped fabric, one-directional print, or plaid. This is also not an option for knits, since the stretch of the fabric would not be oriented correctly. If you have a plain woven fabric, however, this adjustment may buy you the extra yardage you need.
Piece work
Finally, you may piece scraps together to create larger pieces of fabric. Even expensive wedding gowns use this method, since one loom-width of fabric may not accommodate a long train. For example, you may not be able to cut a skirt front on the fold; instead, sew two pieces of fabric together and place the seam at the center front fold.

Be persistent and you may find you do indeed have enough fabric. In fact, your initial shortage may have caused you to do something creative that actually enhanced the finished garment. Admiring friends might think you put bias-cut pockets on your plaid shirt on purpose.

Wednesday, September 3, 2014

Unusual Knitting: Wedding Gowns, Scientific Inspiration, and More


While I still enjoy crafting simple scarves after more than thirty years of knitting, I also love to experiment. If you are also a knitter who likes to ask "What if..." or explore the boundaries of what can be done with two pointy sticks and some string, these patterns are right up your alley.
Wedding Gown Patterns
Yes, you can find patterns for knitted wedding gowns! Interweave Knits offers a free pattern for a full-length lace gown. Vogue Knitting offered a design by Nicky Epstein in their fall 2012 issue. For a theme wedding, the Elfin Bride pattern is gorgeous with long, flared sleeves. A wedding dress is a major commitment, so make sure you knit some sample swatches with yarns you think will work, using the various pattern stitches in your chosen dress pattern. Be absolutely sure you are getting the gauge right, too. Nobody wants to knit for months only to have a dress that doesn't fit!
You Knit a What?!
Just for fun, there are some books I recommend because the projects are so unexpected. Knit Your Own Zoo by Sally Muir and Joanna Osborne is one such book. Why not knit an aardvark or a giraffe? These projects use pipe cleaners where stiffness is required, so don't make them for toddlers or babies.
If you do knit for children, Knitted Farm Animals by Sarah Keen is a better choice. The hen and chicks would make a fun gift for a young child. Another whimsical project is knitted food. Sometimes knitting should just be fun.
Scientific Knitting
June Oshiro created a DNA scarf as a gift for one of her professors. The double helix is created by a carefully charted series of cables. I love this design, but must admit that I gave up after a few inches out of concern that I would lose my place at some point and have to rip out cables (not fun!) I prefer color work to cables, but knitters who love Aran sweaters and have the patience to follow cable charts should give this pattern a go. I chose instead to use my unravelled yarn for a much simpler scarf based on the Fibonacci sequence.
For more ideas and inspiration for mathematical knitting, check out this article from American Scientist. The author, Sarah -Marie Belcastro, has knit Klein bottles, Mobius bands, and other designs that illustrate mathematical concepts. Elizabeth Zimmerman, although not a mathematician, recognized the logical, mathematical nature of knitting and even created the Pi Shawl--a design copied by many knitters on many ways.

Keep knitting interesting by always looking for something fresh to create. Inspiration is everywhere. Enjoy making something extraordinary.

Thursday, August 28, 2014

Make Groovy, Wide-Leg Seventies Jeans


You can make groovy, wide-leg jeans for a costume party, play, or retro dress-up day at school. A few supplies and about an hour of your time are all that is needed. Bring back the style of the seventies without spending a lot.

Supplies for Groovy Jeans
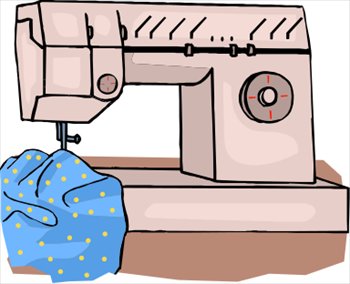
You will need a pair of old jeans, sharp shears for cutting denim, sewing thread thread, a denim needle for your sewing machine, and 1/3 to 1/2 yard of outrageously colorful print fabric. Large flowers or psychedelic designs are great.
Cutting the Groovy Jeans
Cut off the jeans legs at the knee. This is a great way to recycle a pair of jeans with torn knees. Next, measure the circumference (distance around) one leg of the jeans. Multiply this measurement by two, since the new, wide legs should be about twice as full as the knee circumference. This is your width measurement, W. Now measure the distance from the knee to the desired finished length of the jeans and add 2 inches for the top seam and the bottom hem. This is your length measurement, L. Cut two rectangles from your print fabric. Each rectangle measures W by L.
Sewing the Groovy Jeans
You are essentially making two miniature gathered skirts and attaching one "skirt" to each jeans leg. Sew the sides that measure L together to form two tubes of fabric, one for each leg. Press seams open. Gather the tops of the tubes with two rows of basting. Pin the right sides of the gathered tubes to the right side of the jeans knee openings, adjusting gathers to fit. Stitch around legs just outside the gathering stitches.
Try on the jeans and mark the hem. Machine hem the new flared legs. Your groovy jeans are finished!
Additional Ideas
Use leftover print fabric to make a groovy headband to wear with your new jeans. Just cut a strip of fabric long enough to tie around your head. Either hem the raw edges or just fold the fabric to hide the raw edges before tying the headband.
Patches were popular on seventies jeans. Make your own patches by cutting hearts, squares, or big flowers from scraps of the print fabric. Sew patches on jeans by topstitching ¼ inch from edges. Let edges of patches fray.

Finally, waste not, want not. Save the denim legs cut from the old jeans. Use the worn denim fabric to repair old jeans or keep saving denim until you have enough scraps to recycle into a patchwork blanket.

Monday, August 25, 2014

Can You Sew a Dressmaker Suit?


Although I have not yet learned the art of men's tailoring, I have made several of what the old sewing books call "dressmaker suits."  These suits are not as structured as a man's suit, but still require sewing skills beyond the ordinary dress or blouse.

A dressmaker suit or tailored suit is not a project for beginners; however, it is certainly a project within the reach of anyone with strong sewing and pressing skills. With quality materials and the proper pressing tools, a patient home tailor can produce a suit she will be proud to wear to office, party, or church.


To begin, one must know that quality suits are not made of shoddy materials. The best fabric for tailoring is wool. Wool can be easily molded and shaped with steam. Proper interfacings are also essential. Consult your pattern envelope for recommendations. Websites selling sewing supplies are also sources of information when choosing the right interfacings for lapels, waistbands, and collars.

Once quality materials are on hand, carefully cut and mark all patterns pieces from fabric, lining, and interfacings. Tailor's chalk comes in white and colors, and is good for marking smooth fabrics. Tweeds and other textures are better marked with thread tacks. Use different markings for small dots, large dots, and squares, because you will have to match all those markings in order to fit the pieces of your suit together correctly. Tailoring leaves no margin for guesswork; mark accurately! One of the most important markings is the "roll line" which is the line on which the lapel of the jacket folds back against the jacket front. Use a line of basting to mark the roll line.
Carefully follow all pattern instructions, in order. Don't try to "wing it" until you have made a dozen suits or more. Press as you sew. Your pressing is at least as important as your sewing. With wool, use a damp press cloth and press on the wrong side of fabric. Use enough steam from your iron to shape the fabric, but not too much. Overpressing can cause shine or shrinkage. Press curved edges over a pressing mitt or a tailor's ham to get the correct shape. Use the wool setting on your steam iron and do not touch the iron directly to the wool. For fusible interfacings, follow the manufacturer's instructions. Proper pressing tools are available in the notions department of most large fabric stores.
Careful attention to finishing details is the final step on the way to your suit. Consult a sewing book for directions for bound buttonholes or follow the instructions for your sewing machine's buttonhole feature for worked buttonholes. Make test buttonholes using scraps of your fashion fabric, making sure to add the same layers of interfacing and lining as that of the actual suit. Test your buttons to be sure you have sized the buttonholes correctly, then make the buttonholes on the suit. Finish any exposed seams with seam binding, overlocking, or a Hong Kong finish. Sew on buttons, hem the pants or skirt, and enjoy a suit that looks like it came from a custom tailor.
Acknowledgements:

The information on pressing I learned from a 4-H book published circa. 1976. Rupel, Annabel J., "Clothing V, VI & VII," Cooperative Extension Service, Purdue University, West Lafayette, IN

Thursday, August 21, 2014

FiberFrau Waxes Philosophical about Knitting


In knitting, as in life, there are some who enjoy the journey itself and others who are more focused on the destination. Thus, there are "process knitters" and "product knitters." I would call myself a product knitter who is learning to slow down and take joy in the process.

I learned to knit in the usual way, making a garter stitch scarf out of worsted yarn. I was quite bored by the time the scarf was cast off, so I next tackled a cardigan sweater, knit in pieces and sewn together during my daily commutes on the Chicago Northwestern trains. While I enjoyed the process, I also had so many things I wanted to make that I wanted to become faster. I discovered continental knitting, a.k.a. German knitting, in which the yarn is carried in the left hand. For me, this technique increased my knitting speed tremendously. Teflon coated needles also helped me knit faster. I cranked out products as fast as I could for years. I discovered Elizabeth Zimmerman and mastered her seamless sweaters. I learned to knit socks on tiny needles. I learned to do color work holding a different color yarn in each hand. My products went to county fairs and baby showers and Christmas parties. I knit mittens and scarves for my six children. I knit enough cotton dishcloths to last a lifetime.
I knit everywhere. If I found myself in a waiting room or carpool line without my knitting, I almost went mad! Then, finally, I realized that all the time I was cranking out those products, I was falling in love with the process! That wonderful process, with its rhythm and color and texture, was helping to keep me sane in a world that was increasingly fast and impersonal. That process was giving me an outlet for my love of texture and color, as well as fulfilling my need to do something with my hands. That process was even nurturing my brain, as I was constantly trying new techniques and reading about knitting. I was learning that I could enjoy knitting even if it took a long time to finish the product.

I now understand why really big projects, e.g. bedspreads and intricate lace shawls, are most often done by older women. It takes some of us many years to learn to enjoy the journey. "Process knitters" have learned that the journey is a reward in itself; and the finished product, however long it may take, is a nice little bonus.

Sewing Supplies from the Kitchen


Parchment paper is great for baking. Its heat-resistant properties also make it an ideal pressing aid. When pressing seams open, place parchment paper between the seam allowances and the garment to prevent imprint lines. Parchment paper can also be used to protect areas of the garment you don't want to expose to heat while pressing the rest of the garment.
Freezer paper is used by quilters as an aid to cutting and pressing small appliqués. Be sure the shiny side of the freezer paper faces the fabric and the paper side faces the iron, or you will have melted plastic on your iron. For illustrated instructions, see: freezer paper appliqué .
Table knives or cans of tuna make great pattern weights. There is no need to spend more than $10 at the fabric store for a set of pattern weights. Just lay out your pattern, placing just enough knives or cans on each piece to hold the pattern in place for cutting.

An empty coffee or tea tin can be used as a cone thread holder by placing the tin on the floor behind your sewing machine, putting the cone of thread inside, then pulling the thread end up and threading the machine as for a regular spool of thread. I improvised this myself after my son used my pricey cone thread holder as part of a science project!

Monday, August 18, 2014

Vintage Sewing: A Nineteenth-Century Trousseau


Laura Ingalls' trousseau is described in These Happy Golden Years, the eighth book in the children's series that describes Laura's childhood. Pa buys Ma a sewing machine to expedite the preparation of the bridal trousseau. Compare Laura's preparations to those of the modern bride-to-be.

White Goods
Laura buys yards and yards of white muslin, which she and Ma fashion into "...chemises and drawers, petticoats and nightgowns, two of each" (p.240). Heavier muslin is purchased for sheets and pillowcases-again, two sets. Laura trims the white muslin garments with the yards of lace she has knitted and crocheted over the years.
While the modern bride has a choice of many fabrics and colors, she still needs to take care of basic items first. Replace worn items from college with new lingerie. Select quality sheets with a high thread count to ensure long wear and good looks. Get the best towels you can afford; cheaply made towels will need replacement too soon.
Wardrobe
Laura had two good dresses: a brown poplin outfit for cooler weather and a flowered lawn (a lightweight fabric) for summer. She is not sure what else she needs, but Ma knows what she lacks. "I think every woman should have one nice black dress," she declares (p. 266). They go to town and buy black cashmere, from which Ma fashions a grown-up dress appropriate for almost any occasion.
Like Laura, today's bride needs to be prepared with appropriate clothing for a variety of situations. Married life may include religious ceremonies, graduations, dinner with the boss, and funerals. Such occasions are less stressful when you already have the appropriate clothing in your closet. A dark dress or conservative suit is important for serious occasions. For celebrations, have one or two festive outfits in your best colors.
Final Thoughts
Laura, like most girls of her time, had spent her days wisely. After school and chores were done, she used odd bits of time or long winter evenings to prepare items for her trousseau. If you sew, knit, or crochet, you may do this as well. Even a few embroidered pillowcases or a pretty slip can add a custom touch to your trousseau. If you are not a do-it-yourself type, shop wisely. When white sales are on, look for special items to save for your future home.
While some things change, the wise young woman will always do what she can to be ready for the future.
Source:

Wilder, Laura Ingalls. (1971). These Happy Golden Years. New York: Harper & Row.

Thursday, August 14, 2014

Create a Designer's Idea Scrapbook


Scrapbooks are most often used to help us remember important events in life. The clippings and pictures in a scrapbook help prompt the memory. Home fashion designers can use a scrapbook to store ideas and inspiration. Just as an artist quickly sketches ideas as they come to mind, the designer can put reminders of ideas on paper for future reference. Here are some of the possibilities for starting a design scrapbook.

Swatches
Keep swatches of fabrics in your scrapbook. If you have a large fabric inventory, you might forget about the blue batik or the black silk in your stash. Write the yardage next to the swatch, so you know if you have enough for a blouse or an entire dress. Paint chips can be helpful, too. Include a card of paint chips with an interesting color combination.
Clippings
Recycle sales flyers and catalogs by cutting out pictures of appealing designs. An interesting collar or pocket, an unusual ornament, or a fine example of heirloom sewing may inspire you when you design next year's graduation dress. If you see something inspirational in a magazine that is not yours to clip, just sketch the design on any available paper and make notes about color, fabric, and other important details.
Sketches
Play with color by doodling in various color combinations. Make photocopies of a sketch and color the copies in different colors before deciding on a final color scheme. Sketch entire outfits or just a sleeve idea. The point of the scrapbook is to leave a visual record of ideas you find intriguing.
Maintaining a Scrapbook
While many people will tear a page from a catalog or jot an idea on a scrap of paper, those snippets are easily lost. Small scraps of inspiration are more accessible when bound into a scrapbook. A method the author has found useful is to have a sturdy pocket folder for collecting clippings and swatches. Spend an hour or two every few weeks placing the scraps into an inexpensive, spiral bound sketchbook. Be sure to jot a few notes as you glue pictures and swatches in place, e.g. "ideas for Jane's prom dress" or "try this pattern in black lace."

A design scrapbook can be useful for quilters or home decorators as well as those who sew their own clothing. Not only is the scrapbook helpful; it is also just plain fun! Look through the scrapbook on a rainy afternoon and dream of projects to come.

Monday, August 11, 2014

Sewing Your Own Scrubs: Pattern Suggestions

Scrubs are simple in style and made of basic, easy-care fabrics. By making your own scrubs you can achieve flattering fit and use fabrics and colors beyond what you find in ready-to-wear styles. Look for pattern sales at your local fabric store and get several of these simple and useful patterns.
McCall's 6473
This is an excellent pattern for women who want a more fitted scrub top instead of relatively shapeless unisex tops. There are four variations of a pullover scrub top with set-in sleeves in two lengths, in-seam or patch pockets, and flattering princess seams. An elastic casing gives more definition to the waist.
This pattern is especially good for full-figured ladies because it offers three different front pattern pieces: one for A or B-cup sizes and others for C or D. The sewer can easily get a good fit through the bust area without changing the waistline or altering the bust darts of a standard pattern.
The pants have elastic in the back and a variety of pocket options. A top and pants can be made with four to five yards of 45" fabric.
McCall's 6107
This pattern for unisex scrubs includes an easy scrub top with sleeves cut onto the body, two different scrub caps, a lab coat, and comfortable scrub pants with a full elastic waist. A scrub dress with a tie belt is also included. The top and pants are very easy to make and require four to five yards of fabric. A matching cap can also be cut from that yardage.
Simplicity 3542
Women's pull-on pants, empire waist tops and scrub jackets are all included in this pattern. Short or long sleeves, pockets, and contrasting trim options are included. The pattern comes in misses andplus size ranges.
Simplicity 4378
This pattern includes men's and women's mock-wrap and V-neck pullover tops, a snap-front scrub top, and drawstring pants. Instructions are included for sporty stripes down the sleeves if desired. Simplicity 4107 is the plus-sized version of this pattern.
New Look 6634
New Look patterns are known for a little extra style and this scrubs pattern is no exception. A pullover basic scrub top is included, along with pull-on pants with cargo pockets, a scrub cap, and a cute wrap top or dress for ladies. The size range includes teens, men and women.
Conclusion

One or two basic patterns can provide the foundation for a complete working wardrobe if you are in a medical profession. Any of these patterns would be appropriate for nurses, pharmacy technicians, doctors or medical office personnel. Enjoy making one-of-a-kind scrubs that are custom fit just for you.

Tuesday, July 29, 2014

Ideas for Recycling Old Sweatshirts

Old sweatshirts can be inspiration for new crafts. Useful and beautiful household items can be made from discarded sweatshirts. Launder them and cut them open at the seams to yield flat pieces of fabric for your crafting pleasure. Discard worn ribbing and cut out any stains. Save old sweatshirt pieces until you have a stash from which you can choose for crafting purposes. If you have no old sweatshirts, go to a local thrift store and find some. Extra-large men's shirts give you the most fabric for your money.

Blanket or Throw
Cut squares and rectangles from several sweatshirts in coordinating colors. Cut sleeves open at the underarm seam and lay flat to cut. If the sweatshirt has a logo or picture, center it on one of the squares. Arrange rectangles to make a blanket-sized piece and sew together like a patchwork quilt. The seams will not ravel, so there is no need to line the blanket unless extra warmth is desired. Bind the edges with wide bias tape for extra durability. If you have several large sweatshirts from the same college, use them to make a stadium blanket for football season or a picnic blanket for tailgate parties.
Braided or Crocheted Rug
Cut old sweatshirts into long strips, about two inches wide for a braided rug or one inch wide for a crocheted rug. Sew ends of strips together and roll strips into balls like yarn. Braid a rug using 3 balls of fabric strips. Coil braid and lace into a round or oval shape until rug is desired size. Crochet a rug using one ball of fabric strips and a size "P" or "Q" plastic crochet hook. Crochet in rows to make a rectangular rug or in rounds for a circular or oval rug. 100% cotton sweatshirts make absorbent bath mats as well. Craft stores sell non-slip backing for rugs, which can be applied to the finished project.
Baby Bibs

Children's sweatshirts or the sleeves of adult sweatshirts yield enough fabric for baby bibs. Use an existing bib to trace a pattern. Cut two fabric bib shapes for each bib. Place wrong sides together, pin, and sew seam binding around the edges, leaving enough binding at back edges to tie in a bow at the back of neck. Alternatively, use a bib pattern that overlaps in the back and use a snap or hook-and-loop closure. Bibs are another opportunity to recycle the school or team logo on a sweatshirt-use the logo centered in the front of bib.

Tuesday, July 15, 2014

So, You Want to Work in Fashion? A Book Review

Here is a new resource coming soon for tweens and teens:

While television shows us models and fashion designers, this excellent book for children covers the entire world of fashion.  Buyers, stylists, dressmakers, photographers: Fashion is so much more than what we see on the runway.  Children are introduced to these professions and told what education/preparation they will need.  Profiles of people now working in fashion help give an idea of what a day-in-the-life might be like.

As a former bridal alterations specialist, I would recommend this book for school library collections and for use by 4-H leaders, art teachers, and anyone else who might meet fashion-inclined students.

I received a free advance review copy of So, You Want to Work in Fashion? through NetGalley.  Publication date for this book is September 16, 2014.

Saturday, July 5, 2014

New Yarns, New Projects

Here is Rogue's Skinny Scarf done in Caron Simply Soft Light.  I wish you could feel just how soft this scarf is!  Despite its great length (8-9 feet) it is light as a feather.  I plan to keep this scarf and wear it myself.

I reviewed Simply Soft Light as well as Hometown USA yarn on Squidoo recently.  Check out my reviews and try one of these two super-soft yarns: one sport/DK weight and one bulky.  Here is a swatch in Hometown USA:


Tuesday, July 1, 2014

E-Book Sale During July

Use coupon code SSW25 at checkout and get 25% off when you buy FiberFrau e-books direct from Smashwords. Happy knitting!

I'm planning to take a break from scarves to do some baby hats for charity.  If any readers have patterns to recommend, please let me know in the comments.  Baby hats are a fun way to try new yarn and patterns, and you can always donate them to a pregnancy care center, hospital, or women's shelter if you make more than your family and friends can use!

Saturday, June 28, 2014

My Newest Articles on Knitting


Change the Size of a Knitting Pattern: How to scale designs up or down with basic math skills

Great Yarn for Knitters: Review of Lion Brand Hometown USA and Caron Simply Soft Light yarns